Tom Fluharty: A step by step
 | |
| Author | Tom Fluharty |
|---|---|
| Genre |
|
| Published | EF Issue 2017.4 |
Publication date | Fall 2017 |
| Pages | 15-19 |
| Website |
|
Article Description. Should include author, brief description, issue number and page number(s).
Article Transcript
Greetings, fellow caricaturists! I believe we are all cut from the same cloth in that we LOVE caricature. I’ve found that after 20 years of doing caricature, I still love it. It’s still one of the hardest things to do, and yet it remains so stinkin’ cool. I find it difficult because the image I envision in my head sometimes requires a lot of effort to pull off. Sometimes I have to push through mediocrity and make the image look like the image in my mind. Other times, what comes out of my hand feels half-baked and I bail on the image. If it’s a paying job, I hang tight until it rises to the level in my head. Caricature is tough, and I’ve found there are no slam dunks.
Just when I thought Woody Allen was a piece of cake on a gig a few years back, my attempts were mediocre at best, as I struggled late into the night. I went to bed feeling like a loser and got up early and attempted Woody with a fresh mind and fresh eyes. Boom, it worked! So the moral of the story is, if you struggle, join the club. Slap mediocrity in the face and press on and know that each struggle is only making you stronger.
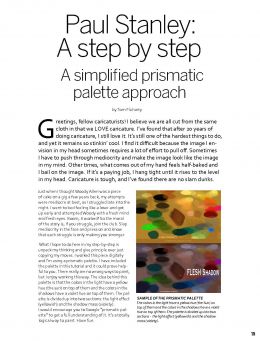
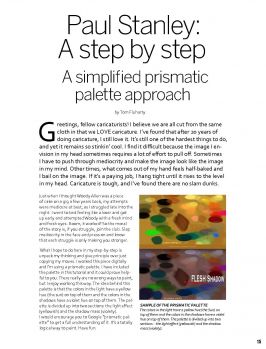
What I hope to do here in my step-by-step is unpack my thinking and give principle over just copying my moves. I worked this piece digitally and I’m using a prismatic palette. I have included the palette in this tutorial and it could prove helpful to you. There really are no wrong ways to paint, but I enjoy working this way. The idea behind this palette is that the colors in the light have a yellow hue (the sun) on top of them and the colors in the shadows have a violet hue on top of them. The palette is divided up into two sections: the light effect (yellowish) and the shadow mass (violety). I would encourage you to Google “prismatic palette” to get a full understanding of it. It’s a totally logical way to paint. Have fun.
1. Main Swipe
Find an AWESOME shot of the subject! This is where everything starts and stops for me. Don’t settle for anything less. Take the extra time needed to nail this rule. I always take as much time as possible to find the greatest photo/image that really captures the subject for me. It must be high resolution if possible, and have a great sense of light.
I also use other shots of the subject as well. Sometimes other shots show a better take on the hair or a nose or the eyes. But I can always rest in the power of that first image.
2. The Sketch
The sketch is the most important part of the image for me. If I miss on the sketch, I have lot more work later on. Such is the case with the quick sketch of Paul I did for this image. It didn’t feel great, but I knew I could pull it off once I started painting, but as a rule I always make sure the sketch feels awesome. Look at it this way — once the sketch is done, it’s a vacation, all the hard work is done. After I sketch the face, I usually find a body that says what I’m looking for and draw that crudely and funny and morph that onto the head, making it work and feel as one. I also look for an image that captures the essence of the background as well. Also, I might doodle a few extra takes on the subject so that I can get a feel for who he/she is. Hence, the blue line sketch of Paul.
3. The Background
In the prismatic approach, I usually start with a blood red background that’s on a loose layer and place every new layer on top of that. I drag my sketch and the body onto a new layer and multiply those layers. I then opaquely paint on a new layer above everything else. On this image in particular, I did not multiply his face but rather erased away the shadow mass, revealing the blood red background. Basically, the blood red background is filling in the shadows.
4. Color
To paint the face, I keep a very clean distinction between the shadow mass and the light effect. For everything in the light, I grab colors from the top of my palette, and for everything in the shadows, I grab from the bottom of my palette (the shadow mass). I also keep the shadows very simple and not filled with lots of details or reflected light. A good rule is to EDIT and SIMPLIFY. It’s harder than it sounds. The main thing to remember is the story is in the light (usually) and unnecessary detail in the shadows weakens the piece. I also keep Paul on his own layer and all of his layers in a group folder. I want to be able to move behind him once I get to the background.
5. Body
At this point, I’m working the painting as a whole. I’m doing work on the whole image, not just an eye, but I’m bringing it all to life. I move around the face and paint the body and make the lighting for his body match the face reference. I also start fleshing out his hands, remembering his hands are pinkish from blood flow.
6. Boots
I paint his boots and pick the places to exaggerate. I make a conscientious decision to call out his skinny little knees compared to his bulky body. I also exaggerate his ankles and skinny them out as well. I’m always thinking of spoofing anywhere I can. Even a shoe string can be spoofed or made funny. Exaggeration is an amazing tool, but if I exaggerate everything, then it loses its punch. I find that it’s better to use exaggeration judiciously or specifically. Pick the places to be funny and let other places be quiet. If everything is exaggerated, then it kills the humor. If everything is volume ten, then it loses its effect. I also start adding in the background at this point.
7. Background
The background must stay in the background. When I put in the background I always remember that it must stay in the background and not jump forward. Sounds easy and really “Captain Obvious,” but the question I ask myself every time is, “Is the background staying in the background?” I also throw a slight blur on it to knock it back.
Another very important aspect of the background is that it has to be designed. It has to support the main actor of the piece, i.e., your subject. I always make sure my lines point into the subject or lead up to the hero.
8. Final Touches
The biggest move I made on this last step was to lasso the face and copy it. I felt like his face was too square and it was hurting the likeness, so I elongated his face and joined it onto the image. I also softened the edges of his hair so that the main things in focus are his eyes and face.
That’s a wrap. I hope you learned something and keep growing as you draw, draw, draw. After all, that’s the most important thing we can do each day as artists.
As I like to say, “It’s so stinkin’ cool to be alive and drawing.” Truly ~ T
See Also
External Links
This Navigation box may not show up on mobile browsers. Please see Exaggerated Features Issue 2017.4 for the full contents of this issue if the navigation box does not display.

